MilleVisionNotes

This site focuses on practical examples of controlling Basler industrial cameras
using the pylon SDK and C#, based on real-world development experience.

タグ: Camera

  • Manual Gain Control with the Basler pylon SDK (C# / .NET 8)


    筆者: [@MilleVision](https://qiita.com/MilleVision)

    Manual Gain Control with the Basler pylon SDK (C# / .NET 8)

    When working with industrial cameras such as those from Basler, exposure time alone is not always enough to achieve the brightness you need. This is especially true when:

    • The subject moves quickly
    • You must keep exposure time short
    • The lighting environment limits the available exposure

    In these situations, manual gain control becomes an important tool.

    This article explains how to read, set, and validate gain values in C# using the Basler pylon SDK. We will also examine how gain affects noise and how to balance exposure vs. gain using practical example images.


    ✔ Environment

    Item Details
    Camera Basler acA2500-14gm
    Lens VS Technology VS-LD25N (25 mm C-mount)
    SDK Basler pylon Camera Software Suite
    Lang C# / .NET 8 (Windows)

    💡 What Is Gain?

    Gain represents electronic amplification of the sensor signal.

    • Increasing gain brightens the image
    • But it also amplifies noise, reducing image quality

    Because of this trade-off, gain should be balanced with exposure time rather than used alone. Exposure increases brightness with lower noise, but may blur moving objects. Gain brightens the image without changing shutter time but introduces noise.


    🔧 Code: Setting and Reading Gain

    Below are simple helper methods for manual gain control.

    Set Gain (manual mode)

    Auto Gain Mode

    Read Gain

    public double GetGain()
        => GetPLCameraParamter(PLCamera.Gain);

    📷 Gain in Practice: Image Comparisons

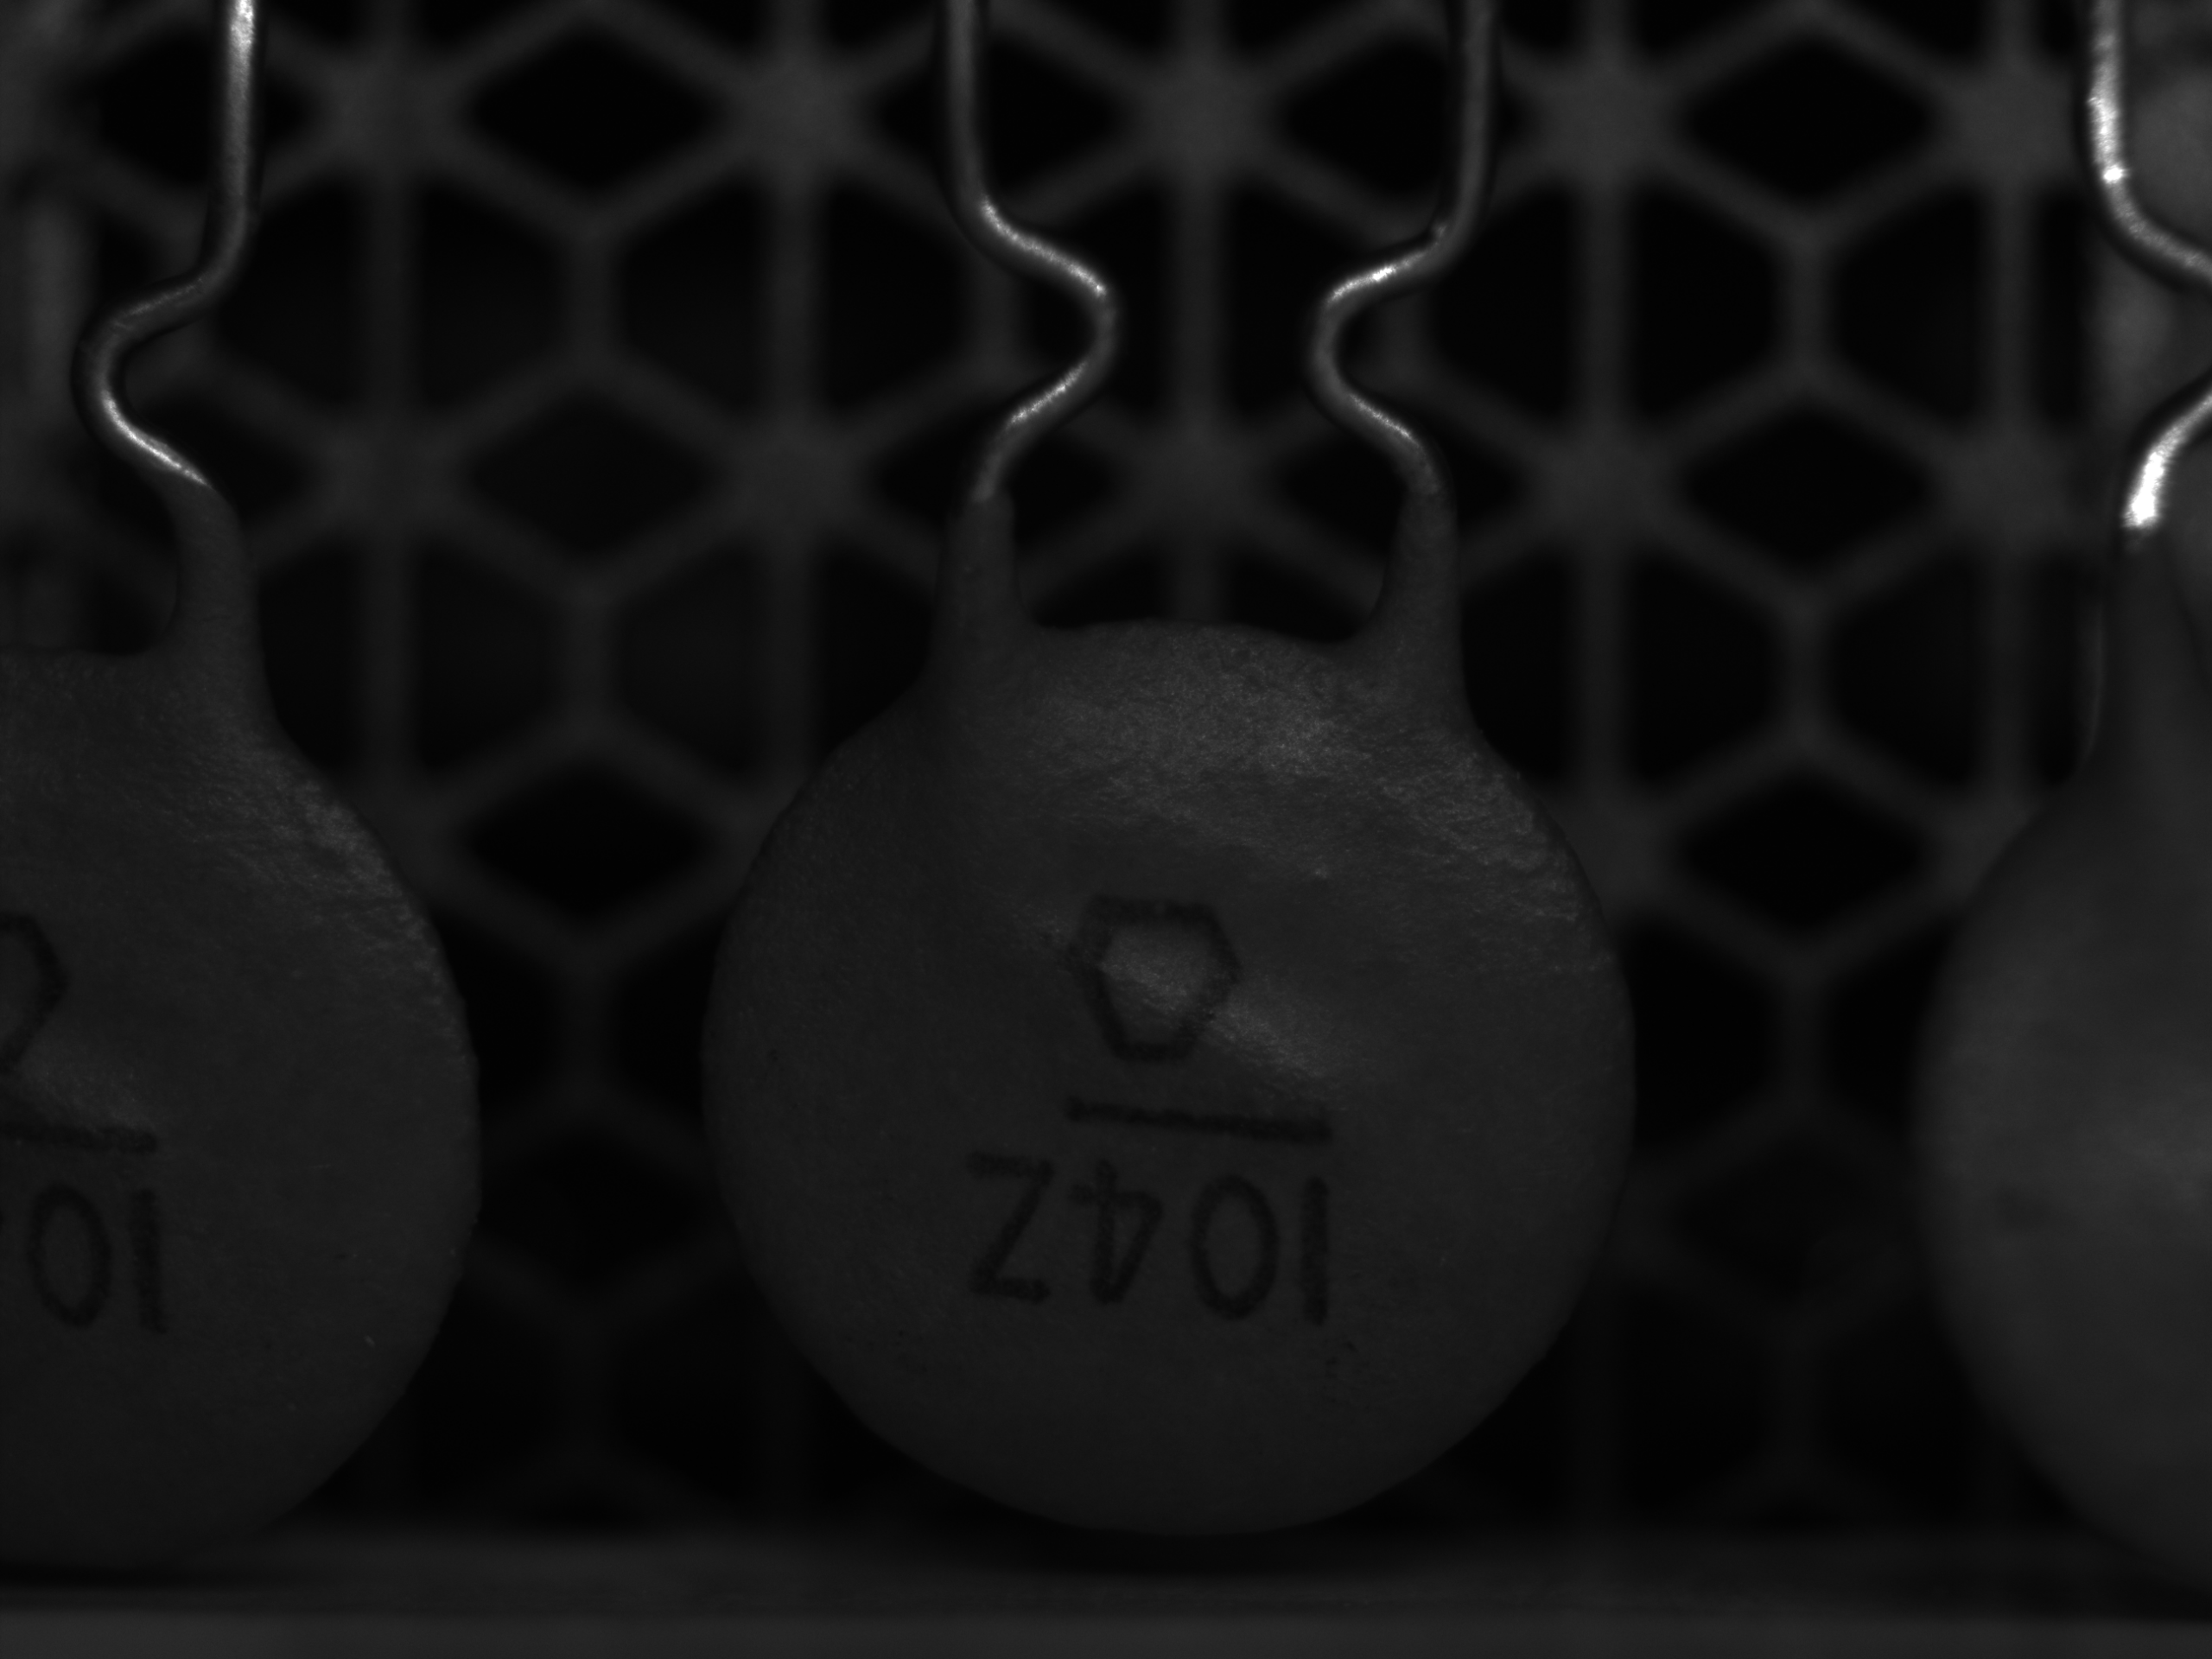
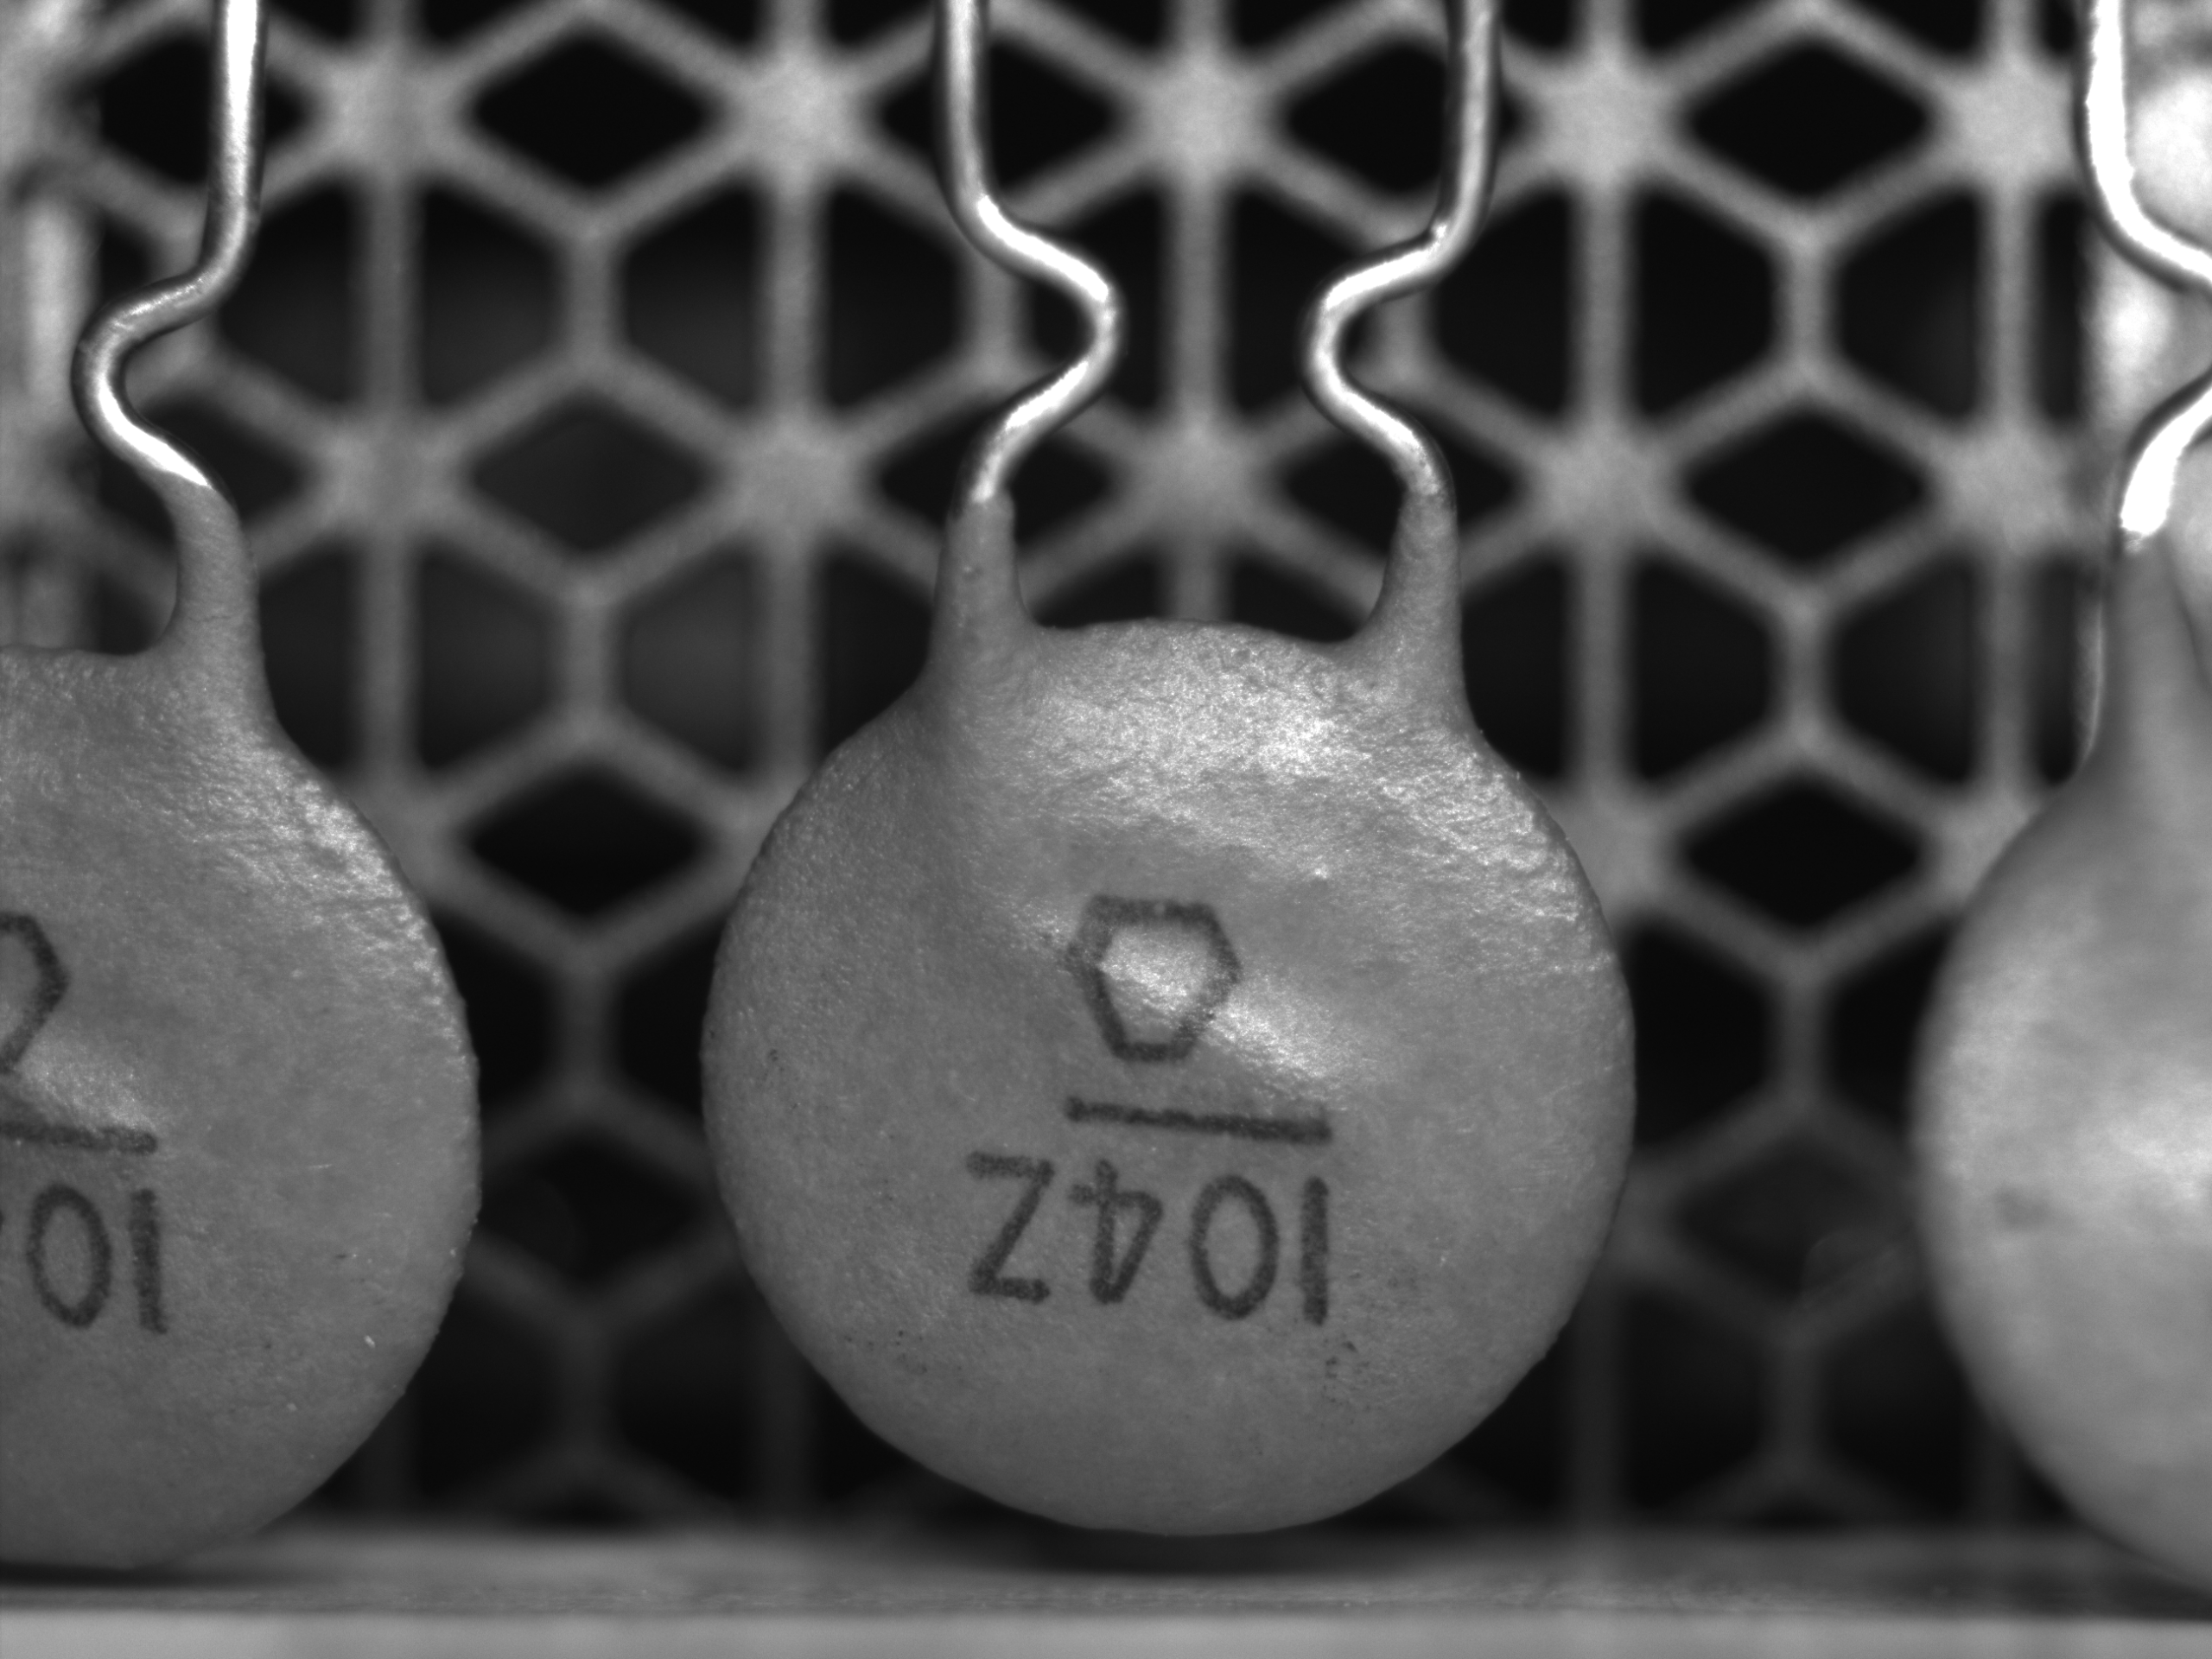
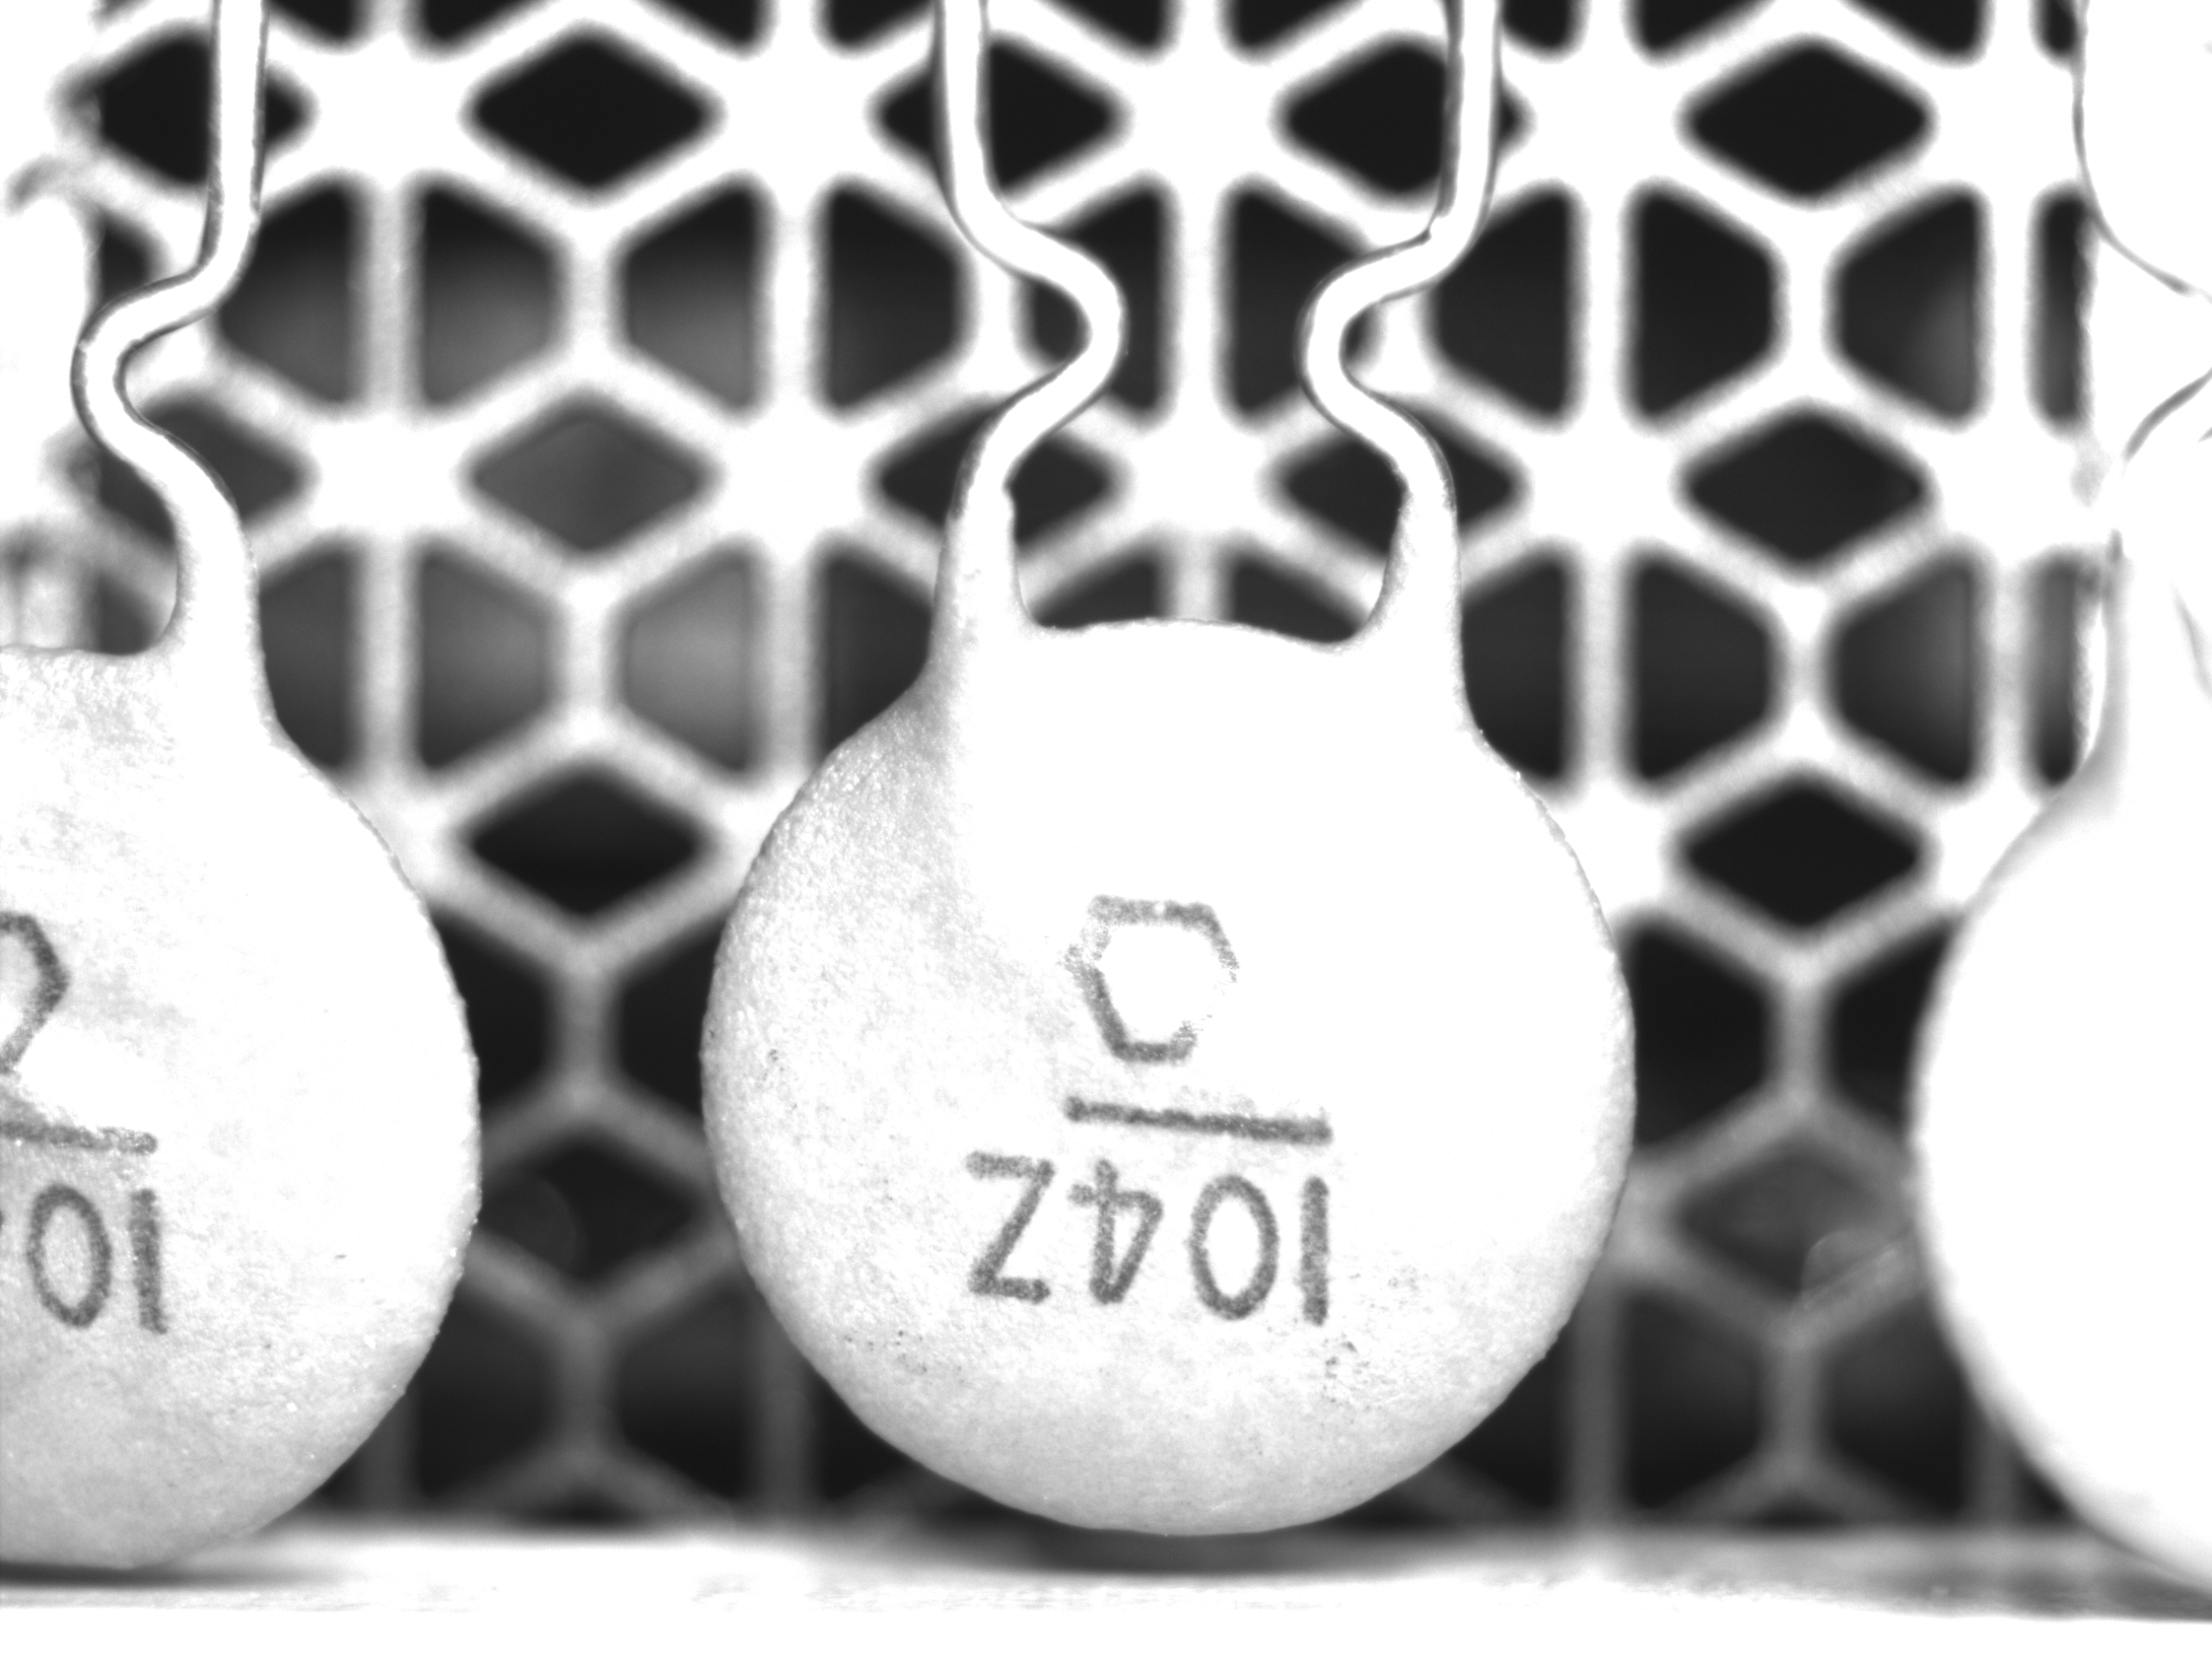
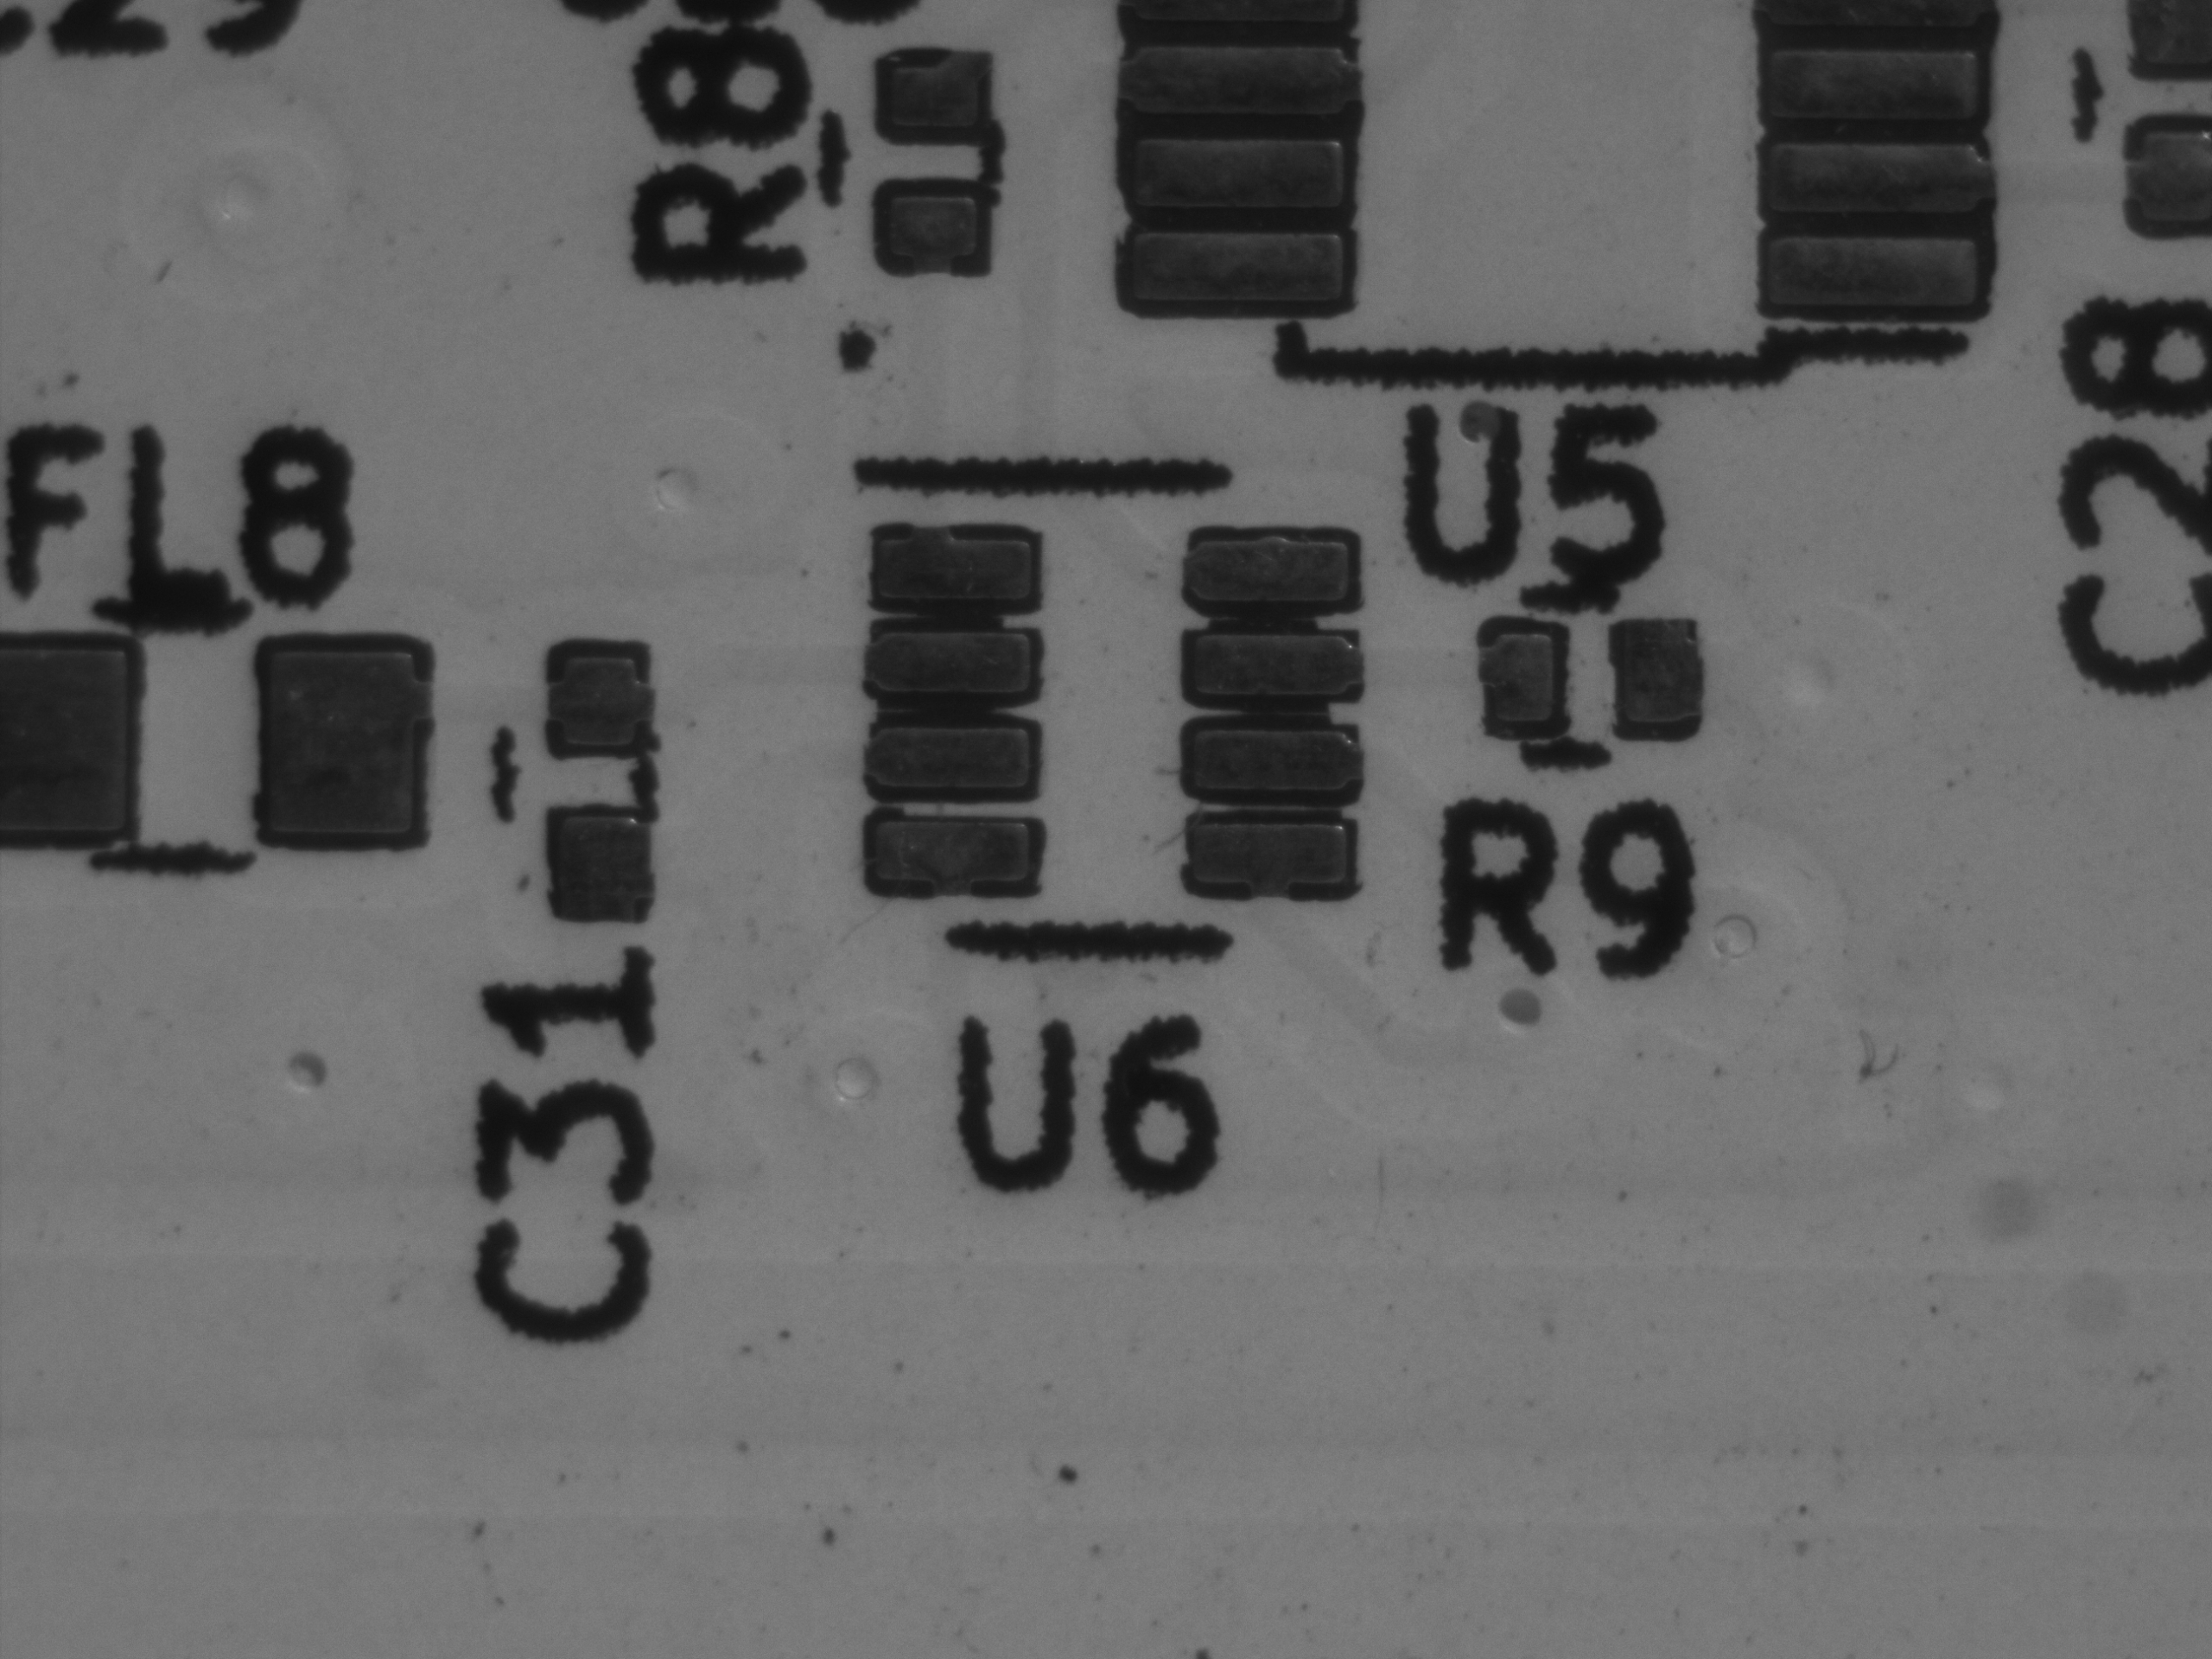
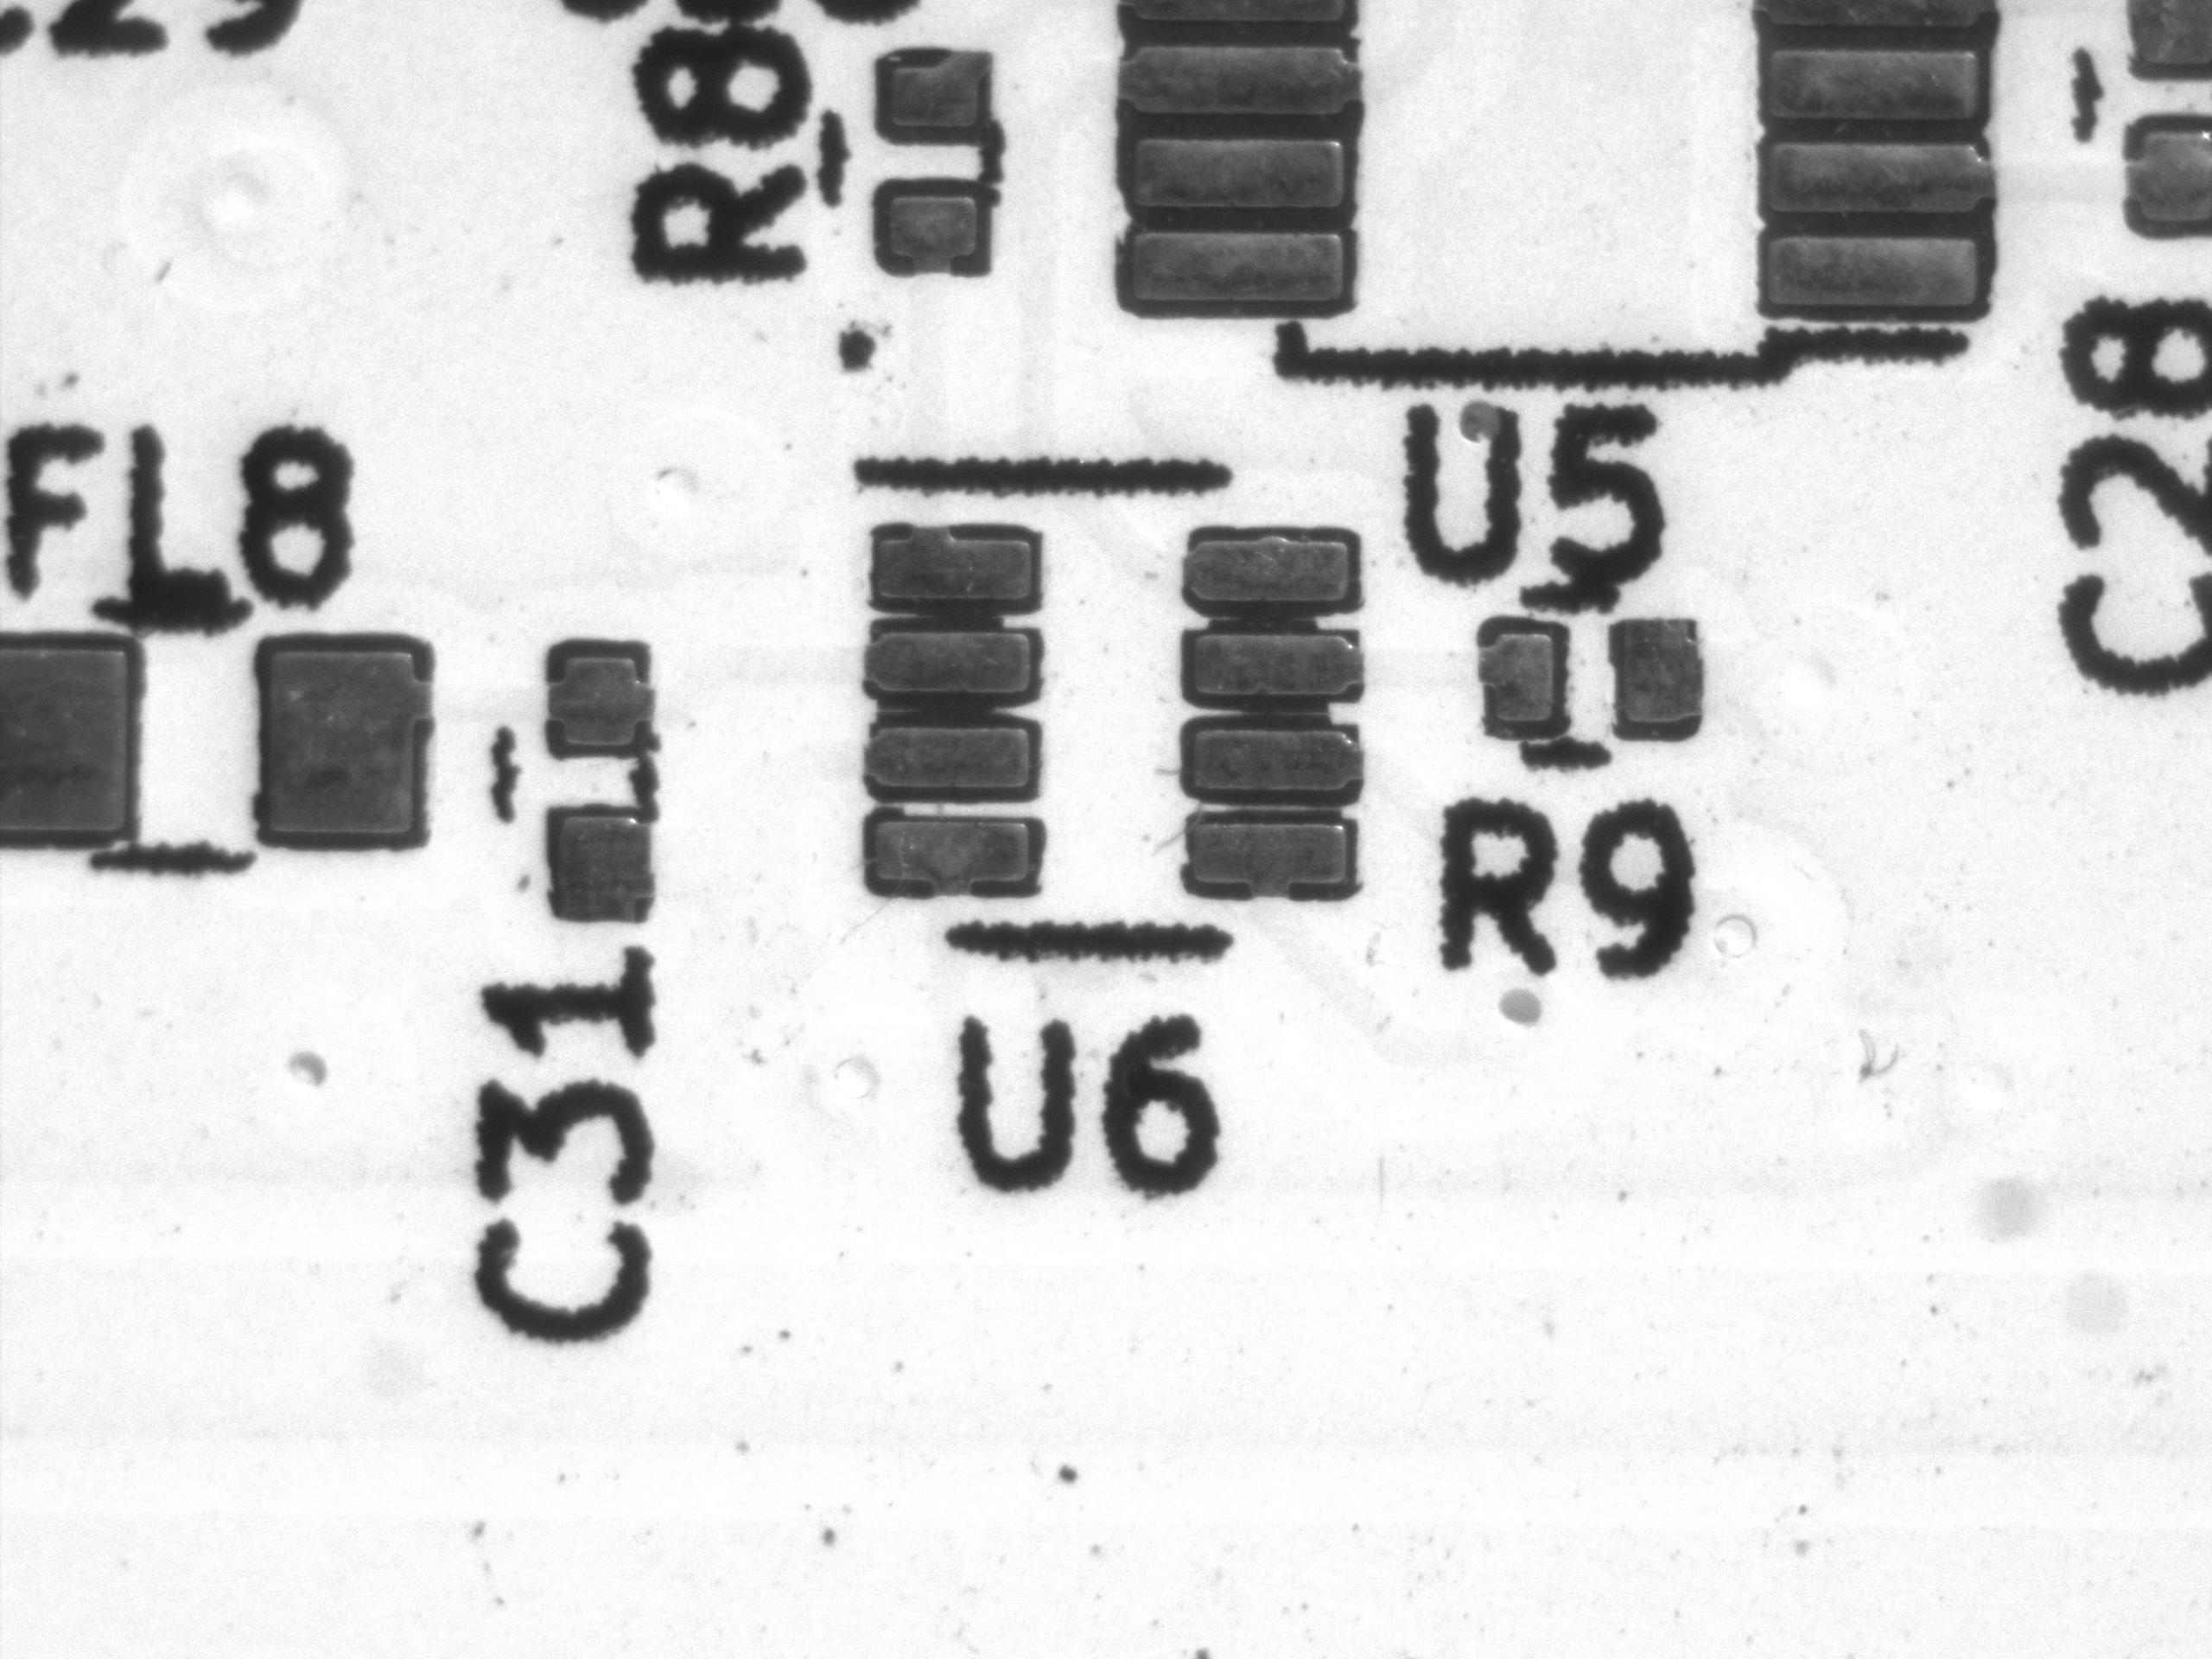
    ① Exposure Fixed, Gain Increased

    In this test, exposure time is constant while only gain is changed. You can clearly see how higher gain results in brighter images but more noise.

    Gain 0 dB Gain 12 dB Gain 24 dB
    Gain0fixed Gain12fixed Gain24fixed

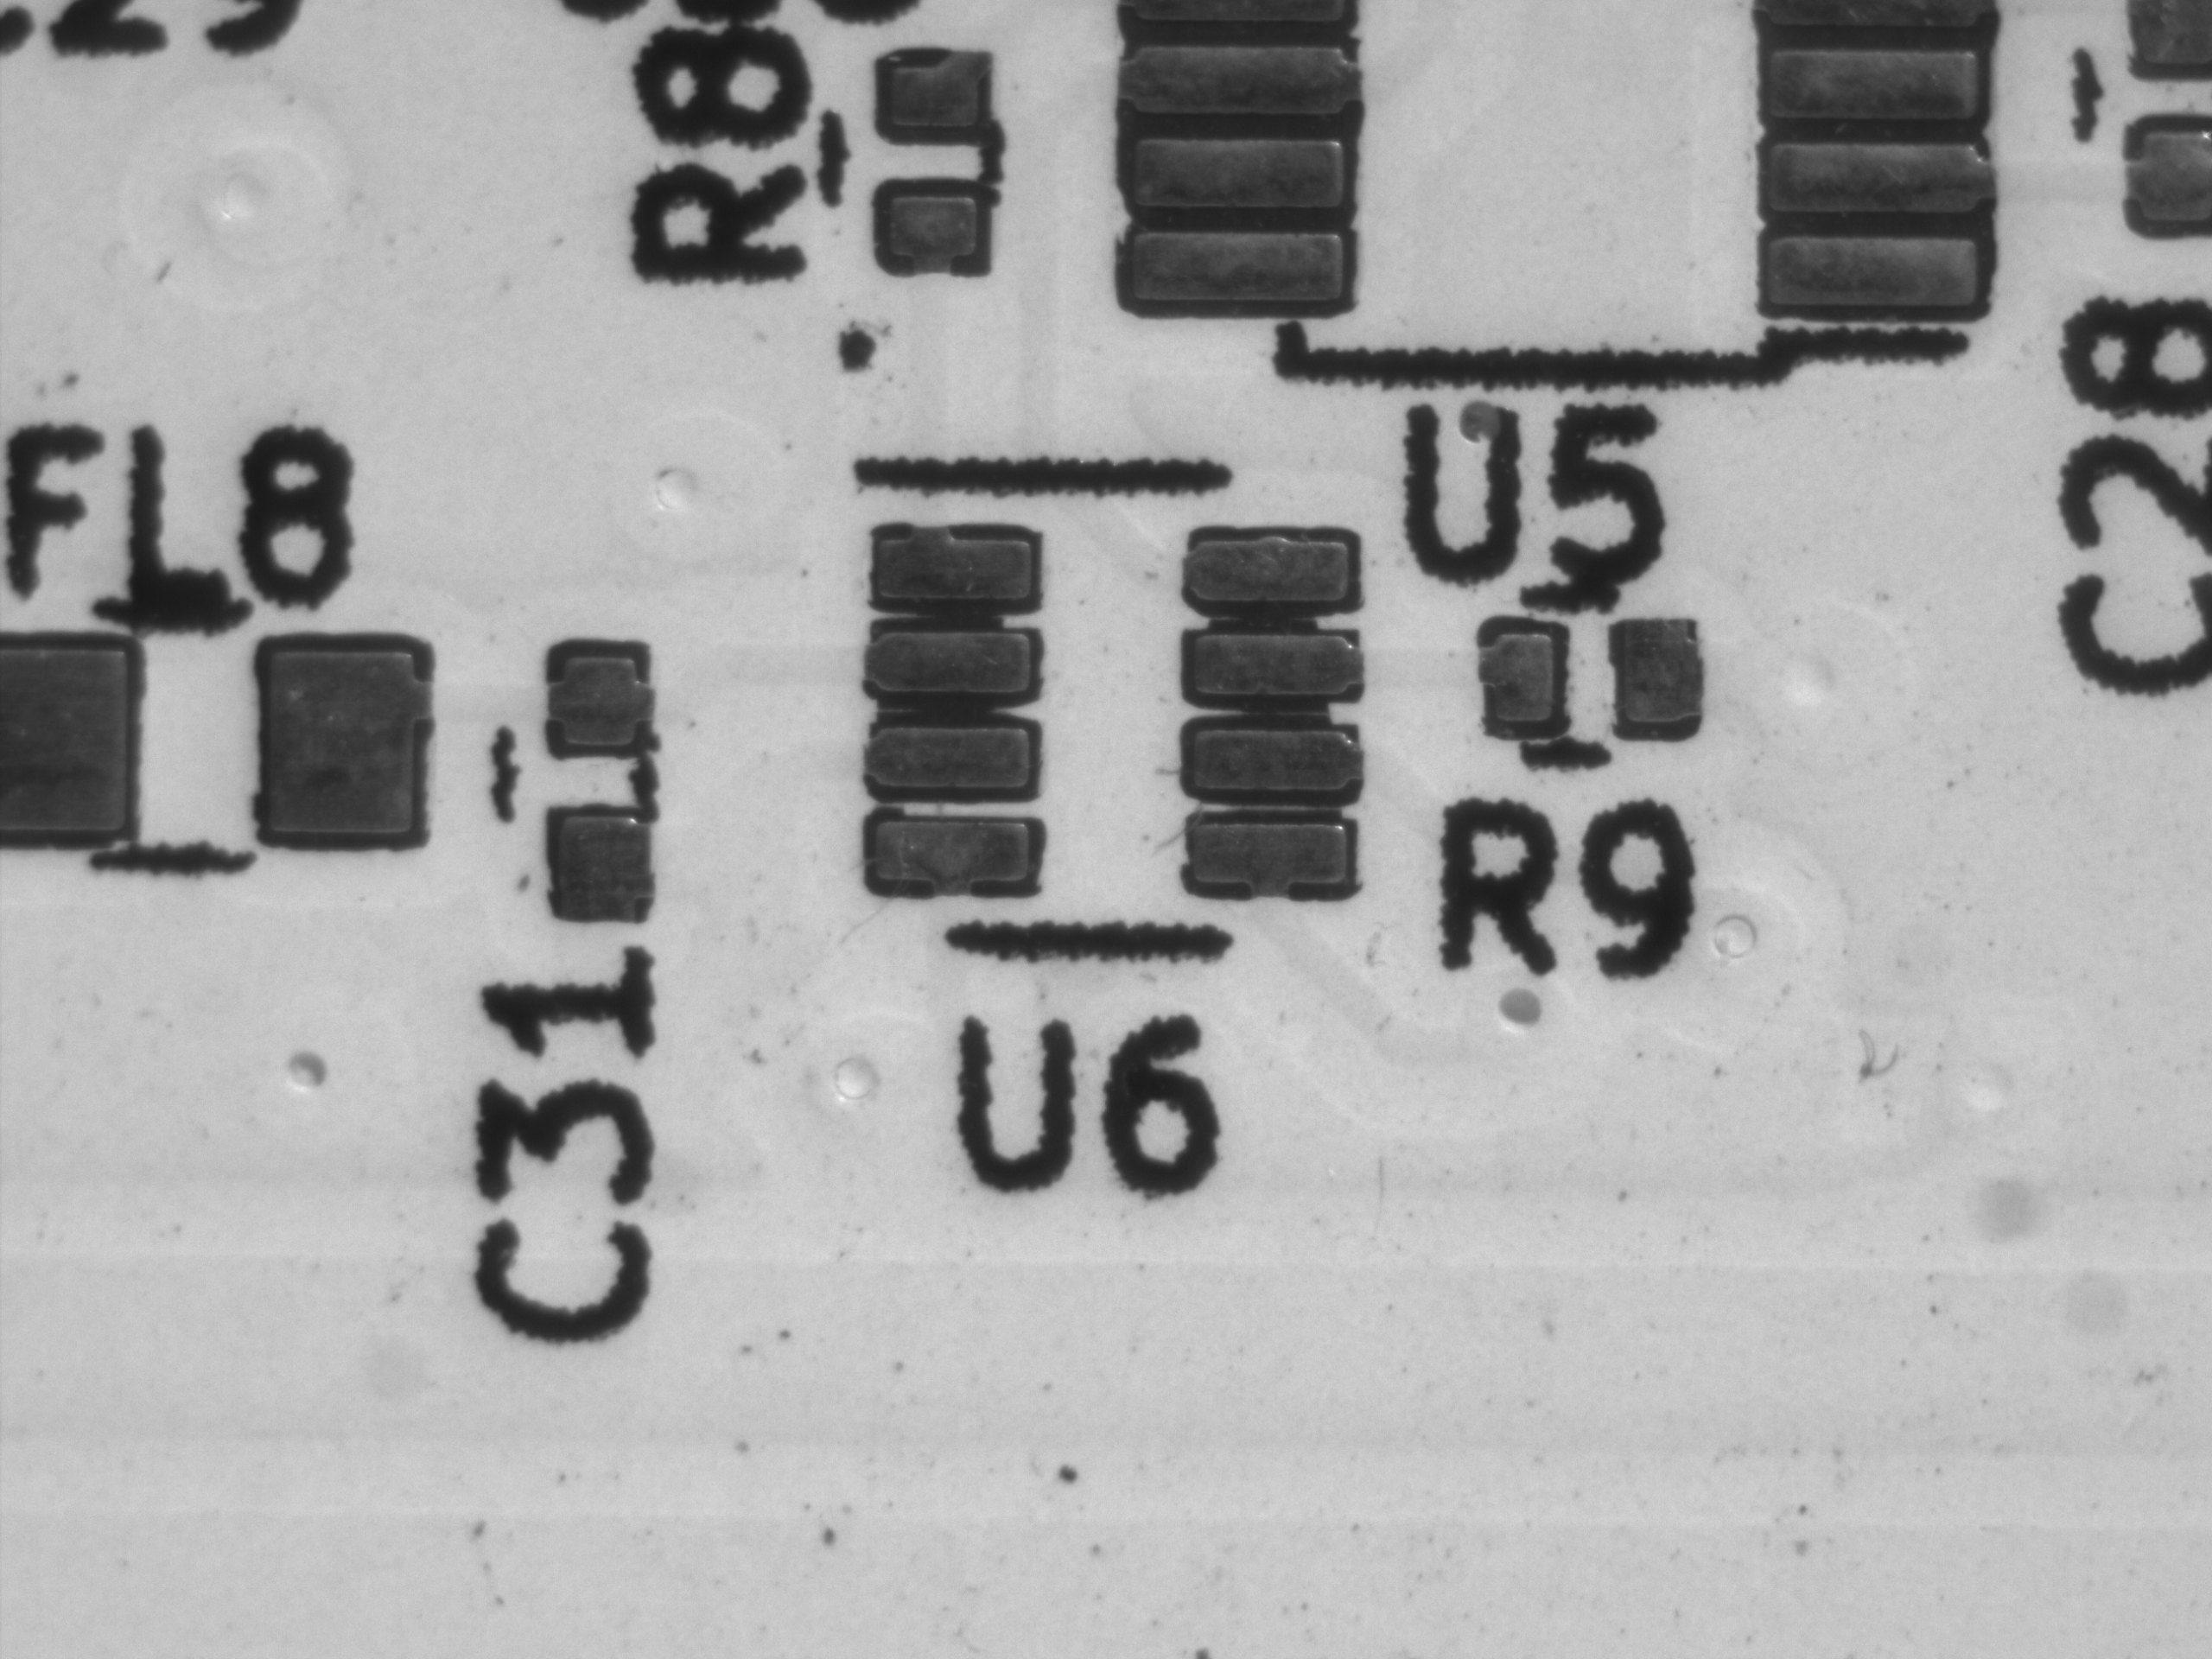
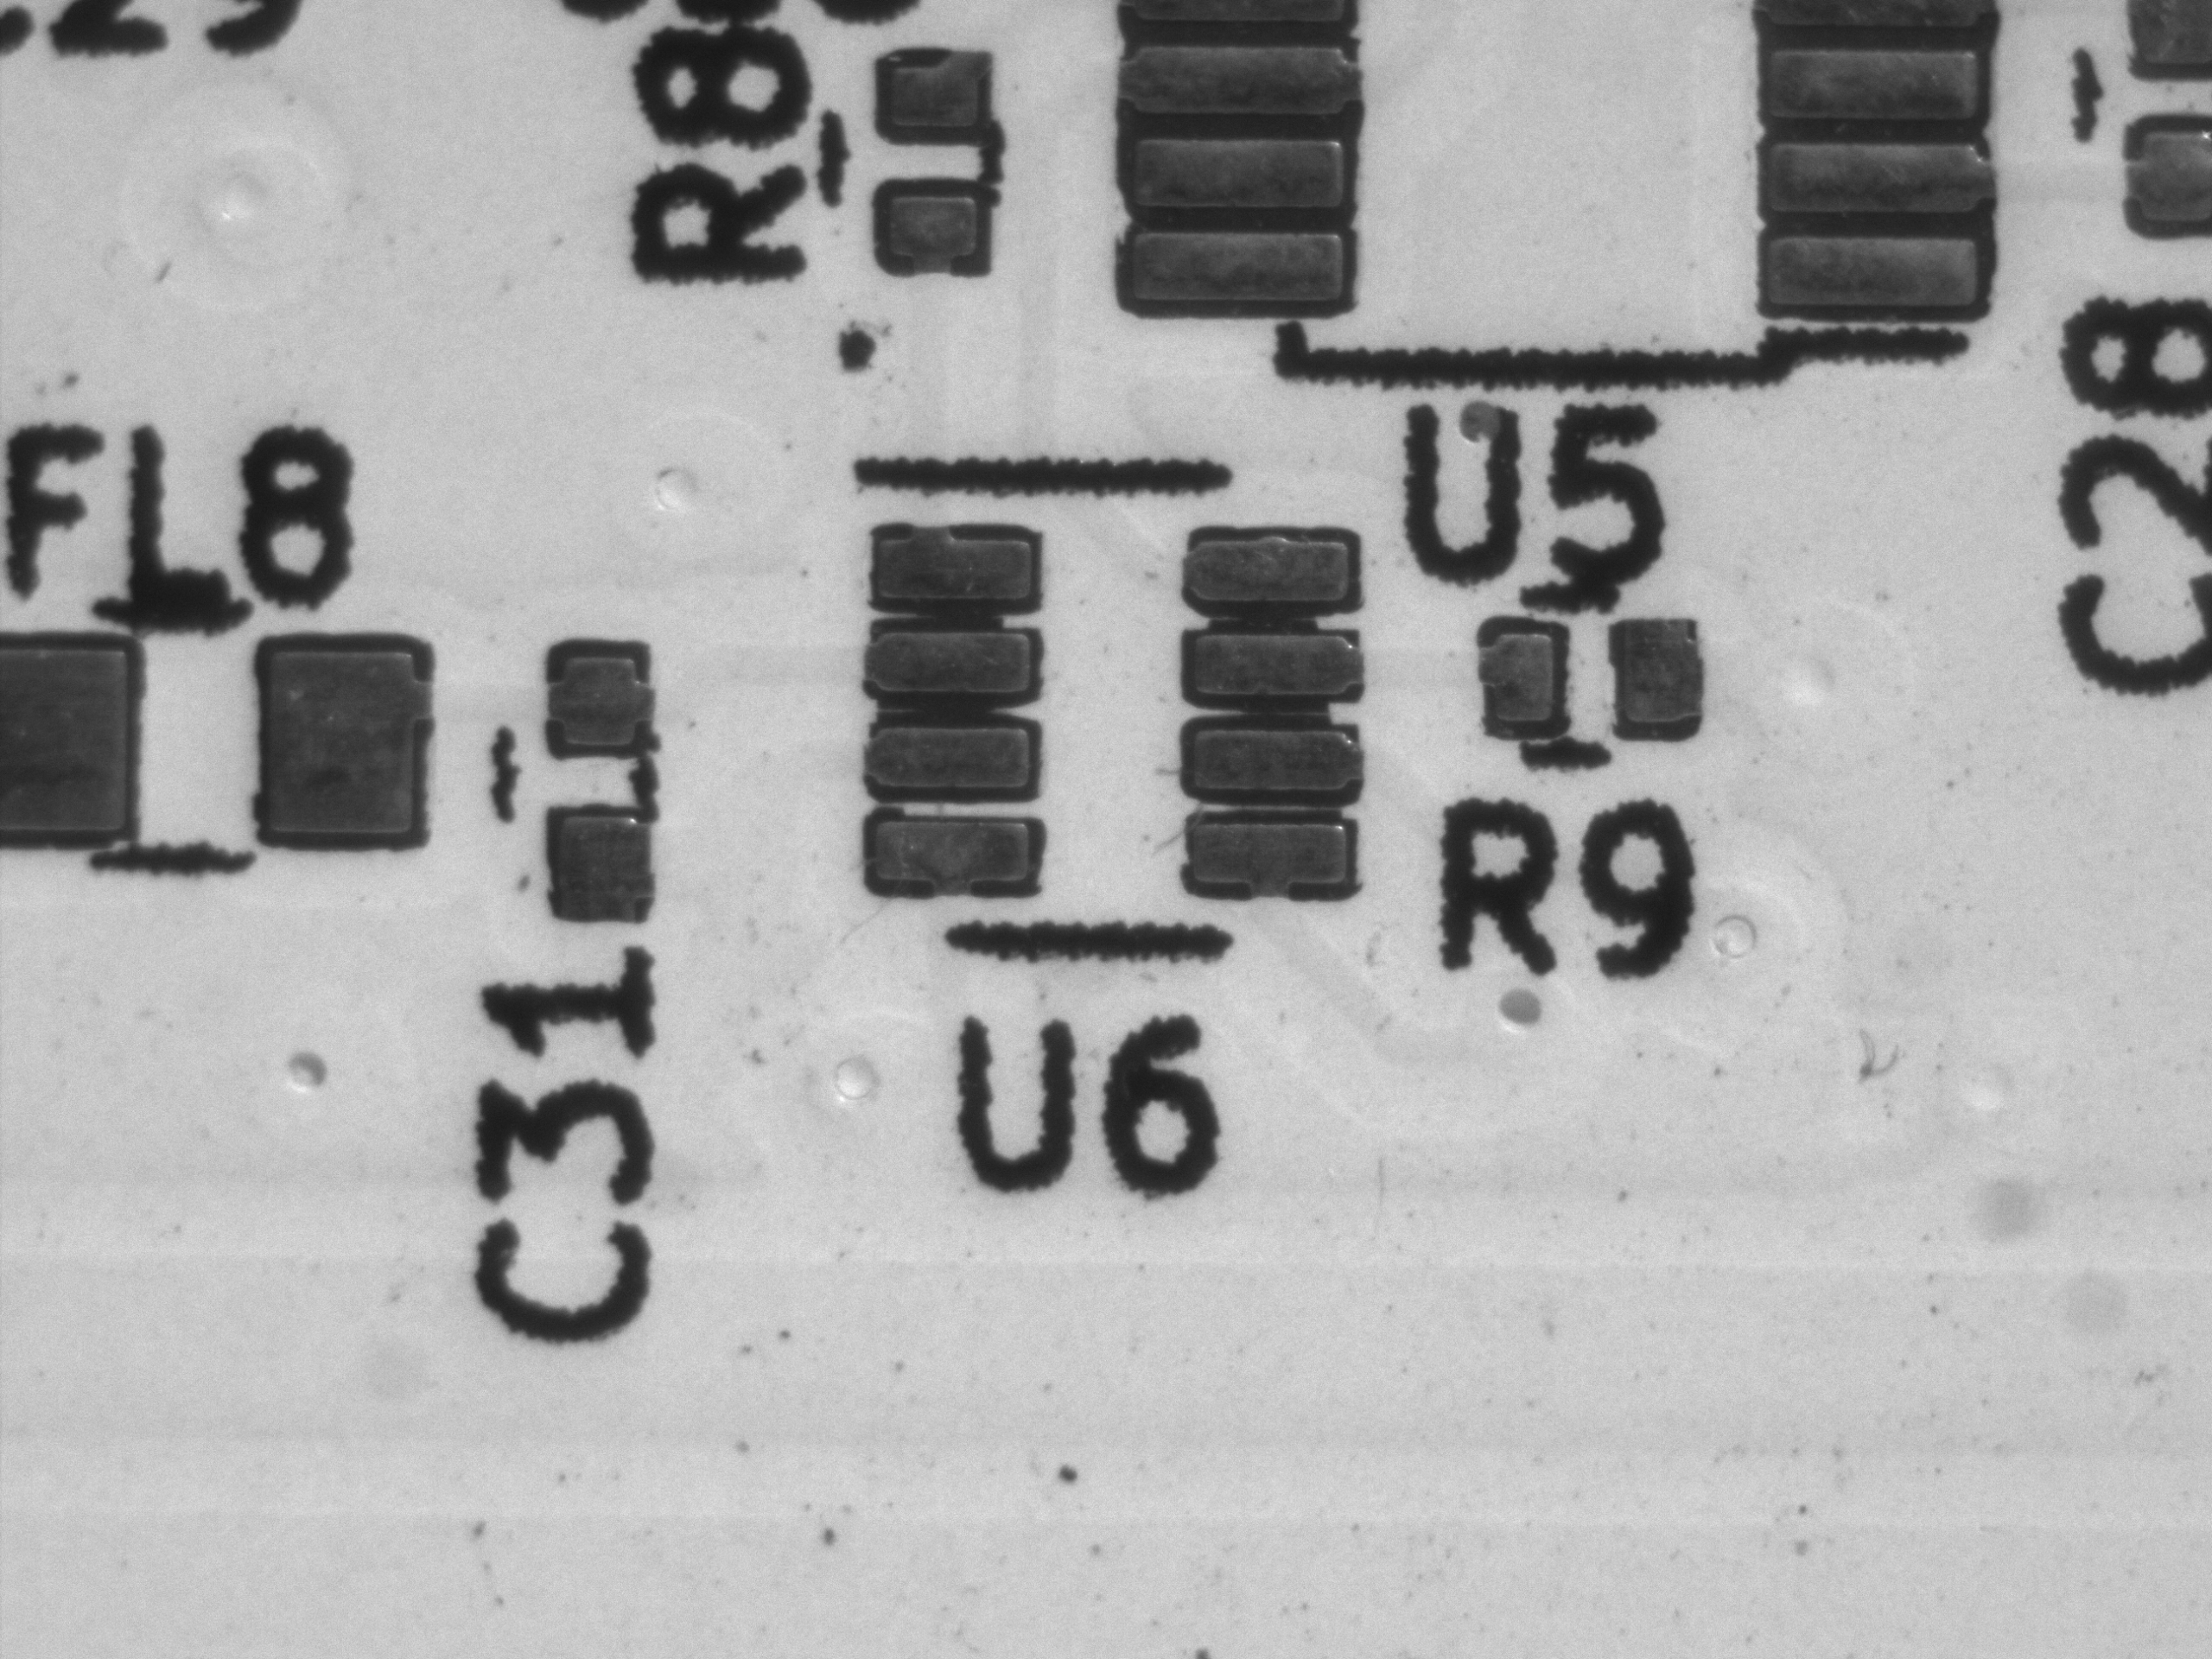
    ② Same Brightness, Different Gain (Exposure Adjusted)

    Here, exposure time was adjusted so that the brightness remained approximately constant, allowing you to see just the difference in noise.

    Gain 0 dB (60ms) Gain 12 dB (24ms) Gain 24 dB (12ms)
    Gain0exp60ms Gain12exp24ms Gain24exp12ms

    💡 GainRaw ↔ Gain (dB) Conversion

    Basler cameras often expose two gain parameters:

    • Gain (in dB) — user-friendly
    • GainRaw — internal integer register value

    The mapping between them varies by camera model, but it can typically be approximated by a linear transform:

    This is useful when a camera supports only GainRaw or when you need precise dB control.


    🧭 Troubleshooting Common Gain Issues

    Issue Cause / Solution
    Gain does not change GainAuto is not set to Off
    Parameter write error Value outside the allowed range — check GetMin() / GetMax()
    Noise becomes excessive Gain too high — prefer exposure when possible
    Cannot write to Gain Parameter not writable → likely because auto gain is active

    When Gain Cannot Be Set

    If GainAuto is not disabled, the parameter:

    Camera.Parameters[PLCamera.Gain].IsWritable
    

    will be false, preventing manual writes.

    Always check IsWritable before writing to avoid runtime exceptions.


    📝 Summary

    • Gain amplifies brightness and noise — unlike exposure, which brightens with less noise

    • Set GainAuto = Off to enable manual gain control

    • The balance between exposure and gain is crucial:

      • Exposure = cleaner images, but motion blur risk
      • Gain = no blur, but increased noise

    By comparing images side-by-side, we can see why most machine-vision systems prioritize exposure first, then use gain sparingly.


    🔜 Next Article

    With exposure and gain under control, the next major topic is trigger modes and frame synchronization. We’ll explore hardware triggers, software triggers, and best practices for synchronized acquisition.


    筆者: @MilleVision

  • How to Manually Control Exposure Time Using the Basler pylon SDK (C# / .NET 8)


    How to Manually Control Exposure Time Using the Basler pylon SDK (C# / .NET 8)

    Have you ever felt that your industrial camera images look too dark, too bright, or fluctuate unexpectedly?
    Automatic exposure (auto-exposure) can be useful, but in many machine-vision or inspection systems, consistent lighting is essential, and automatic adjustments can cause instability.

    With the Basler pylon SDK, you can switch exposure control to manual mode and specify an exact exposure time (in microseconds), enabling stable and predictable imaging.

    This article explains how to set, read, and validate exposure time manually using C# and the pylon SDK.


    ✔ Environment

    ItemDetails
    CameraBasler acA2500-14gm
    SDKBasler pylon Camera Software Suite
    LangC# / .NET 8.0 (Windows)

    💡 Background: GenICam and Camera Parameters

    Parameters such as ExposureTimeAbs used in this article follow GenICam (Generic Interface for Cameras) — an industry standard used by Basler, FLIR, IDS, JAI, and many other industrial camera manufacturers.

    With GenICam SFNC (Standard Features Naming Convention), you can access:

    • Exposure
    • Gain
    • ROI / image size
    • Trigger settings
    • Acquisition modes

    all using a common parameter model.

    👉 GenICam SFNC specification:
    https://www.emva.org/standards-technology/genicam/

    This article focuses on practical usage, but knowing that pylon follows GenICam helps when switching between camera brands.


    🔧 Setting Exposure Time Manually

    Below is an extension to the BaslerCameraSample class from the previous article.

    Method: Set Exposure Time (manual mode)


    Helper Functions

    Set auto-exposure mode (Off / Once / Continuous)

    Set an enum parameter

    Set a floating-point parameter (e.g., ExposureTimeAbs)


    🔍 Reading the Current Exposure Time

    Use GetValue() to read exposure parameters from the camera.


    💡 About ExposureAuto Modes

    ValueBehavior
    OffManual exposure (used in this article)
    OnceAdjusts exposure once, then fixes it
    ContinuousContinuously adjusts to maintain brightness

    📷 Example: Change Exposure and Capture Images

    The test below captures images at 5 ms, 20 ms, and 50 ms.


    📊 Exposure Comparison


    5 ms (darker) 20 ms (balanced) 50 ms (brighter)
    5ms 20ms 50ms

    🧭 Common Issues & Troubleshooting

    IssueCause / Solution
    Exposure does not changeExposureAuto is still On
    Value outside valid rangeExposure too long or too short for the camera model
    Image too dark/brightLighting or gain settings are insufficient
    Exposure fluctuatesExternal lighting or auto exposure still enabled

    📝 Summary

    • Set ExposureAuto = Off to enable manual exposure control
    • Exposure time is specified in microseconds (μs)
    • pylon SDK accesses all parameters through Camera.Parameters[...], following GenICam SFNC

    🔜 Coming Up Next

    Exposure alone may not give enough brightness range depending on your lighting environment.
    The next article will cover manual gain control using the pylon SDK.

  • How to Capture a Single Image from Basler ace Camera using pylon SDK in C#


    How to Capture a Single Image from Basler ace Camera using pylon SDK in C#

    Basler industrial cameras can be controlled easily using the pylon Camera Software Suite.
    In this article, I’ll show you how to connect to a camera, grab a single frame, convert it to a BitmapSource, and save it as a .bmp file—all using C# and .NET 8.

    When I first started working with Basler cameras in a .NET environment, I found very few practical code examples.
    This guide is based on tested code from my own applications.

    This article covers:

    • Connecting to a camera
    • Capturing one frame (Snap)
    • Converting to BitmapSource (WPF-friendly)
    • Saving the image as .bmp

    ⚠️ Important Notice

    This article demonstrates how to develop custom applications using the Basler pylon Camera Software Suite SDK.

    • The content here is based on my own testing and implementation
    • It is not endorsed by Basler AG
    • The SDK itself is not redistributed here (no DLLs, headers, etc.)

    To use the SDK, download it directly from Basler’s official website:

    🔗 pylon SDK download
    https://www.baslerweb.com/en/products/software/basler-pylon-camera-software-suite/

    Make sure to review the EULA, especially if using the SDK in commercial or high-risk environments:
    https://www.baslerweb.com/en/service/eula/

    The sample code in this article is provided strictly for learning and reference. Use it at your own responsibility.


    ✔ Environment

    ItemDetails
    SDKBasler pylon Camera Software Suite
    LanguageC# (.NET 8.0 — Windows)
    CameraBasler acA2500-14gm
    OSWindows 10 / 11

    1. Connecting to the Camera

    First, create a simple wrapper class for managing the connection.
    You can connect to the first available camera or use a specified camera name (as shown in Basler pylon Viewer).


    2. Capturing a Single Image

    The simplest way to grab one frame is by calling GrabOne() through the Stream Grabber.


    3. Converting to BitmapSource (for WPF)

    IGrabResult cannot be displayed directly in WPF.
    We convert it to a BitmapSource using PixelDataConverter.

    Supports:

    • RGB8packed
    • BGR8packed
    • Mono8 (default fallback)

    4. Saving the Image as .bmp

    A simple helper method using BmpBitmapEncoder:


    5. Example Test Code

    You can easily test the entire pipeline (grab → convert → save) using the following:


    ✔ Output Example

    The captured image will be saved as:SaveBitmapTest.bmp

    Example output:

    (Image from the original article)


    ✨ Conclusion

    Although official documentation covers the basics, hands-on .NET examples for pylon are still relatively rare.
    Fortunately, pylon’s .NET API is clean and integrates smoothly with Windows desktop applications such as WPF.